HOW do I set things up to host a class?!?
There are a couple ways to start a meeting. Whichever route you go, the goal of this is to get the meeting address to provide to your students.
This is going to seem a little weird at first, but one of the ways to do this is via Google Calendar!! Yep, calendar. There are two ways to make this happen in calendar. The second of the two is likely preferred when viewed through a FOIP lens, but both calendar methods will be outlined here, as well as how to do this directly through Google Meet..
It should also be noted that you CAN use the same link over and over and over. So, you can set one Meeting link, provide it to your students, and then use that same Meeting address for every single class you conduct online.
Method #1 – No FOIP Considerations… Yet…
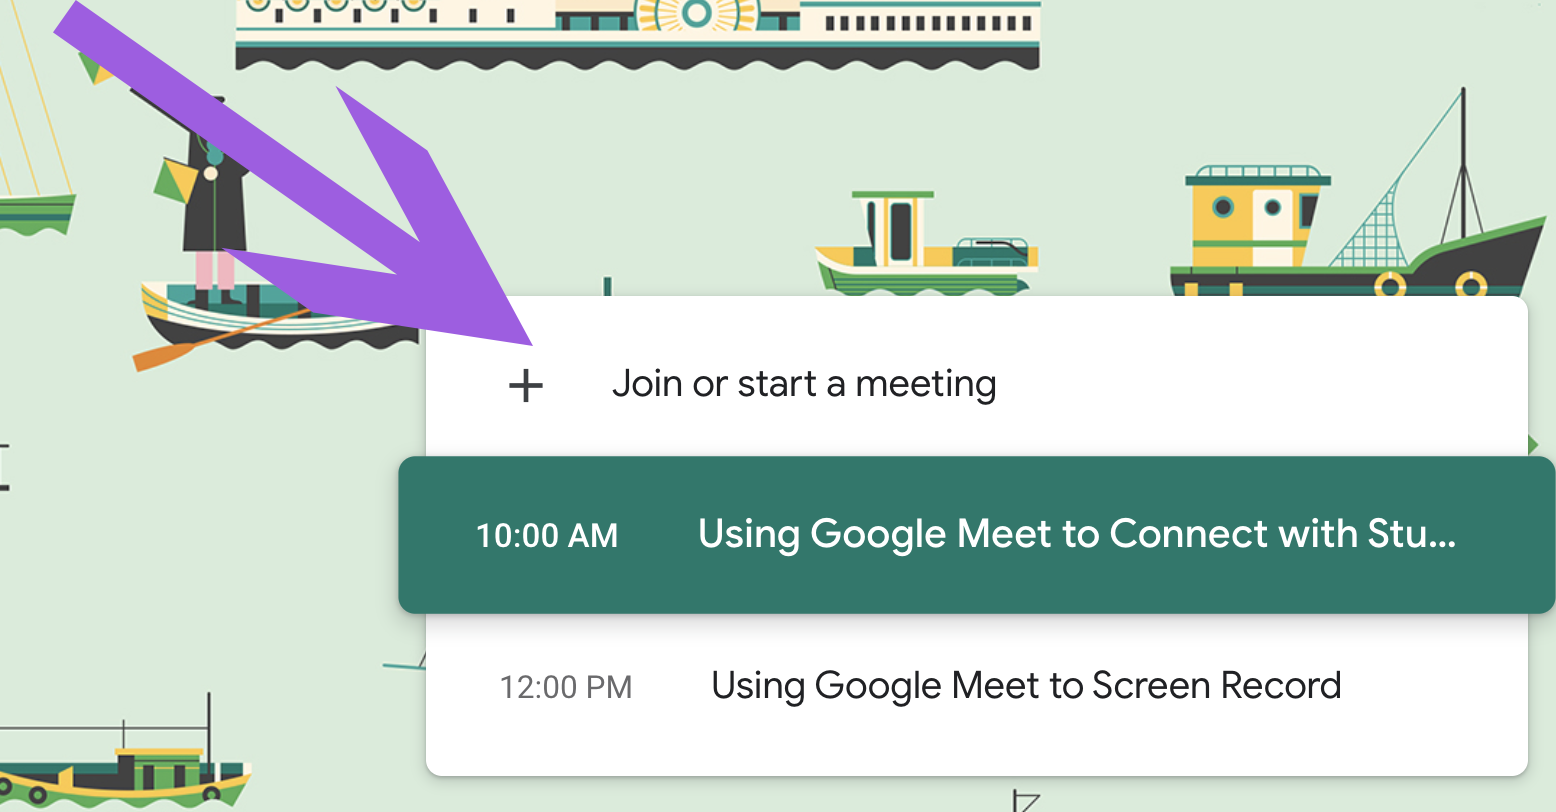
Go to meet.google.com
Click Join or Start a Meeting
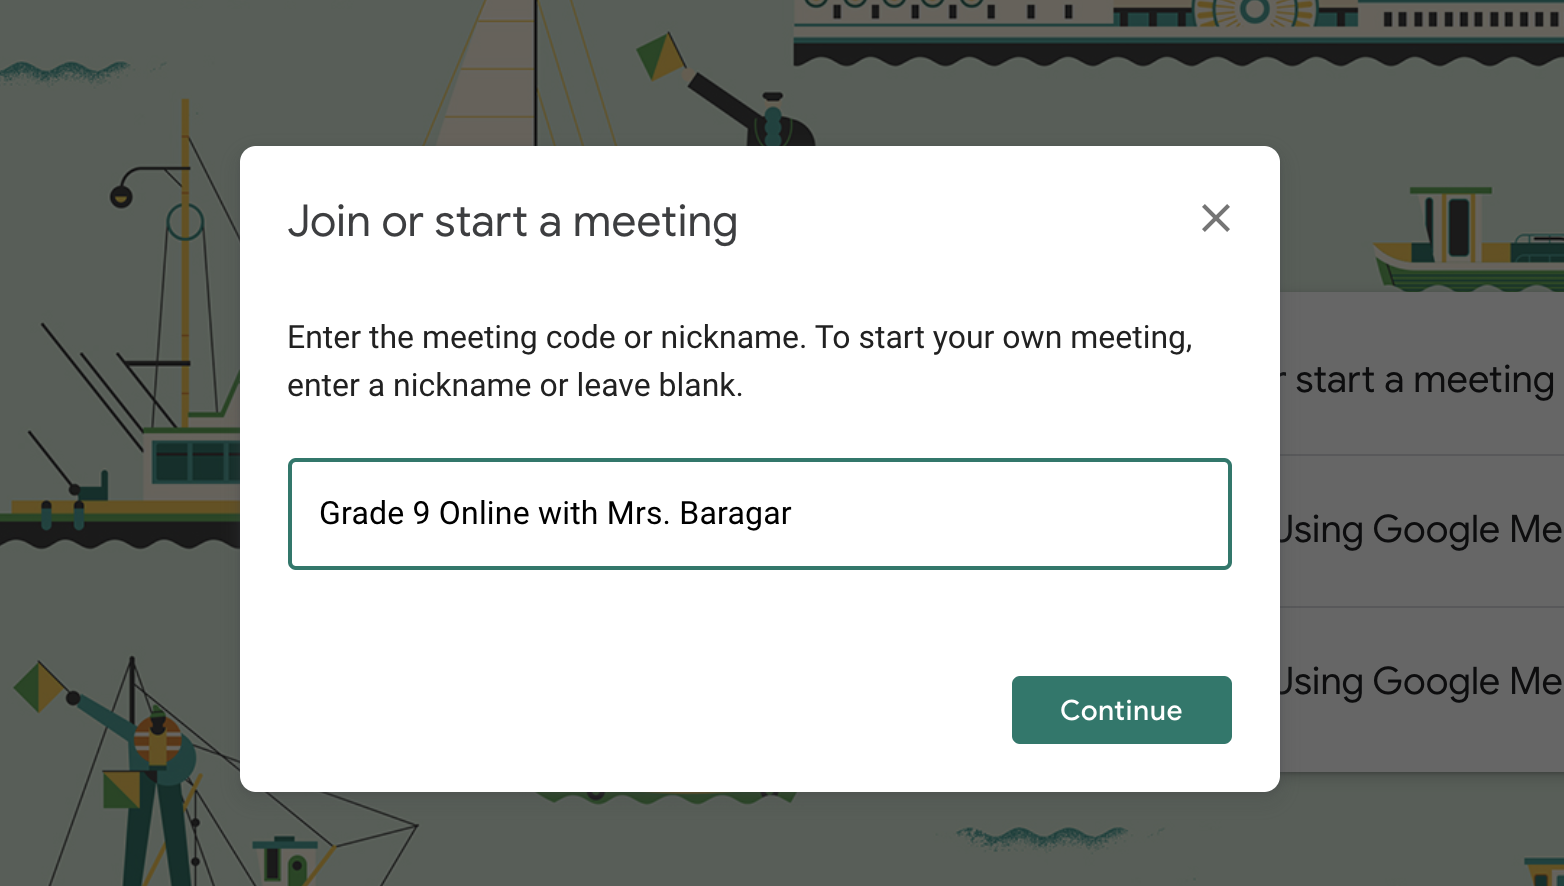
Give your meeting a name that describes the meeting. Click the continue button.
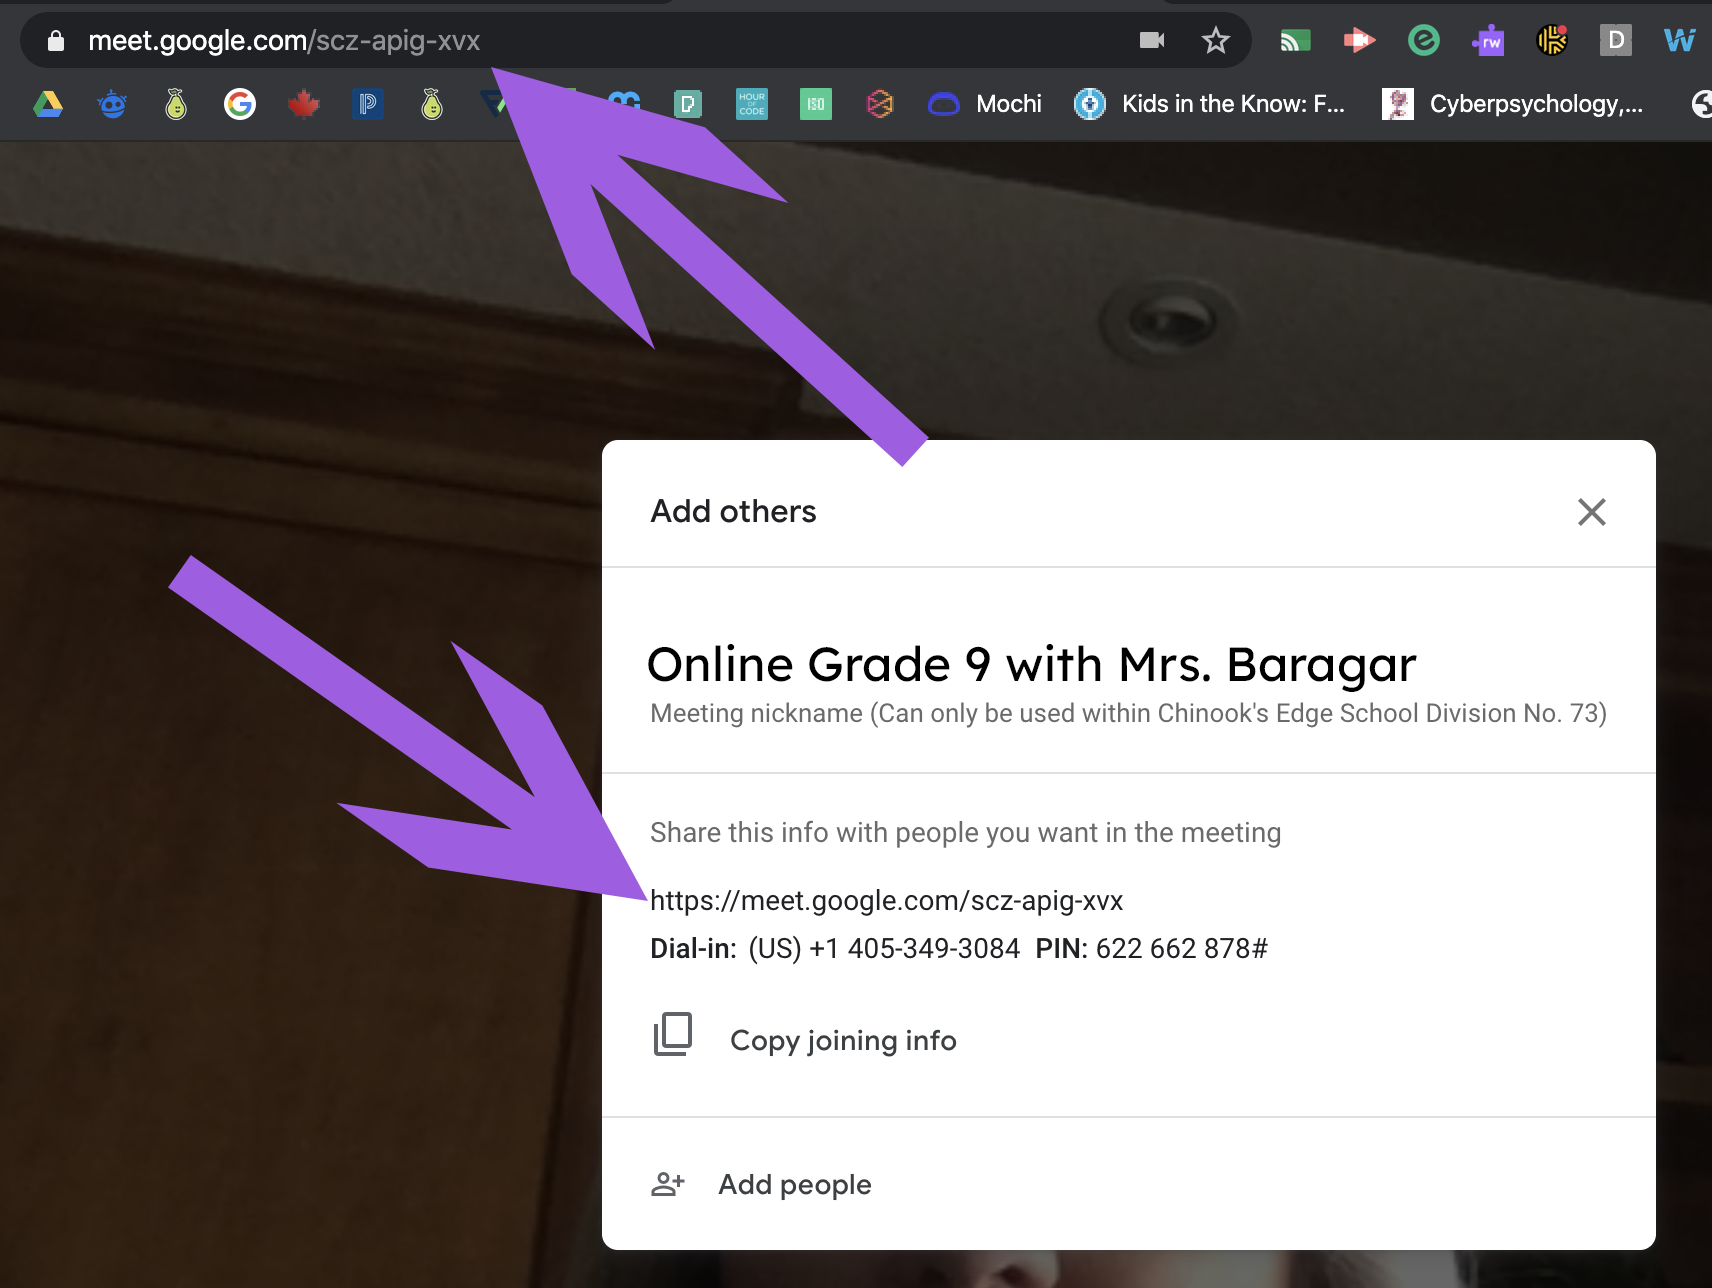
Copy that join information and provide it to all your students. You can use that same link over and over and over.
Method #2 – No FOIP considerations… YET…
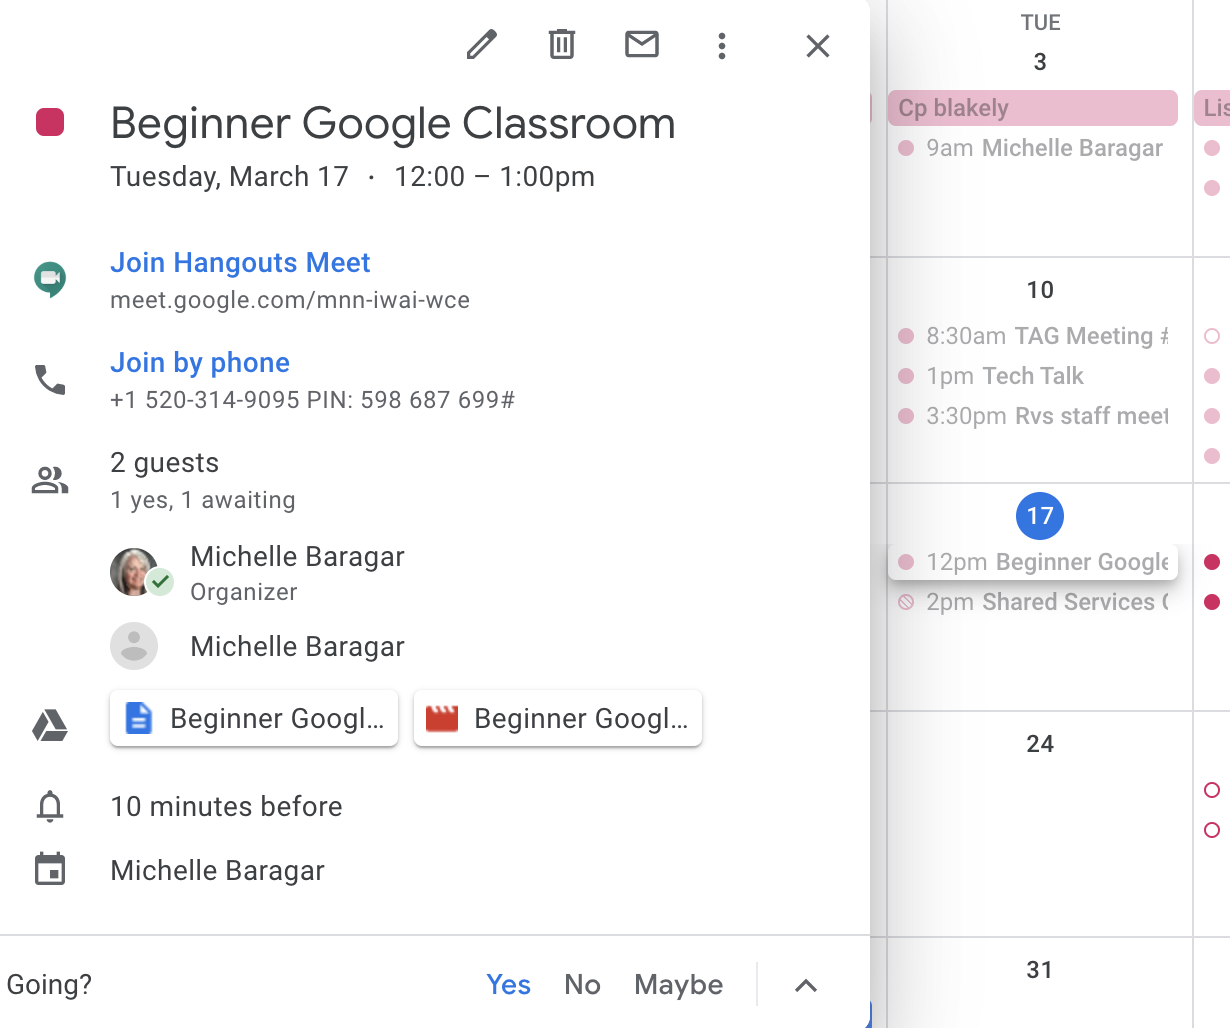
Most people have never noticed that when they receive an invitation to a meeting or an event in Google Calendar that there is a “Google Hangouts” link provided. As soon as you create an event, add a time, and invite someone else to join your event, the link to the Google Meet (Hangouts is being discontinued) online is generated automatically. That means you literally don’t need to do anything!!
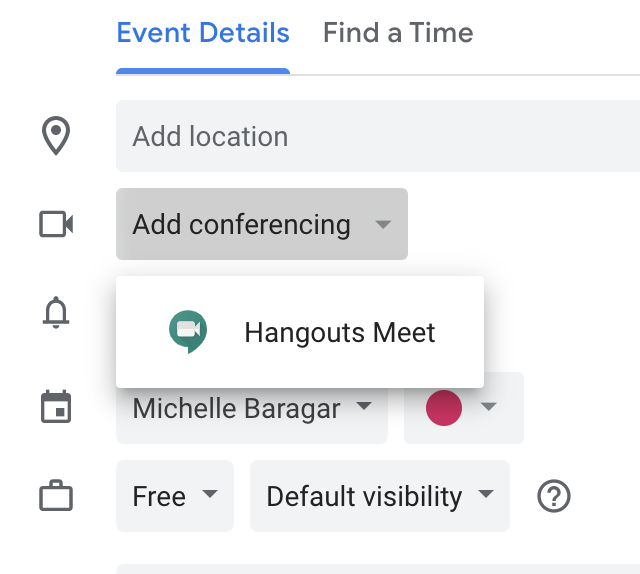
This method of generating your meeting address means that the FOIP considerations will not factor in until later in the process. In this method, you create the Google Meet link in Google Calendar without inviting anyone; it merely involves clicking on the “more options” link at the bottom of the event creation pop-up and then clicking the “add conferencing” dropdown menu.
Method #2 – Use intentionally as FOIP factors in here
To create a meeting, go to your calendar and make sure that you:
- Set the date AND TIME. If there’s no time set, no link will be created.
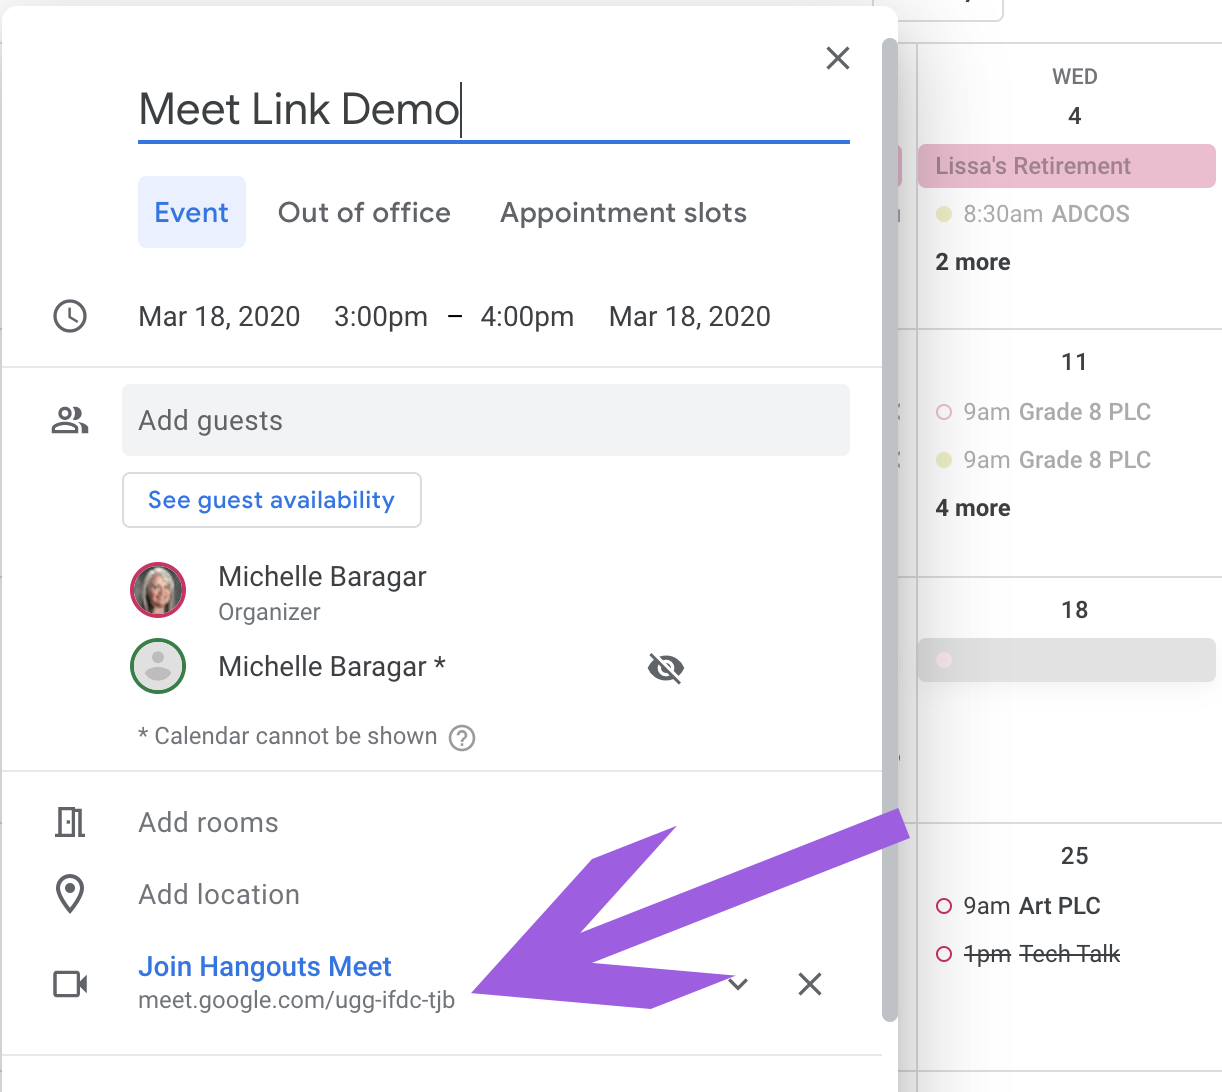
2. Invite someone. Anyone. (in the above screenshot, I invited myself via my personal email).
You can invite your whole class and then set the event to repeat (daily? weekly? it’s your call). Every repeat of the event will contain a link. There is something REALLY important that you need to know about inviting students:
If you use calendar to invite your students to the session, they ALL automatically have access to the recording afterward.
Read that again.
Certainly providing the recording to students is part of the reason why we would record, but FOIP does factor in. More about this in the module titled “It says I can record the meeting. Can I?“
3. Provide the link to your students. If you entered them as guests for your event, the links will be in their calendar. When the session is over, if you recorded it, they will ALL have access to the recording in their calendar invitation. Google Meet will attach it there after the session is over.
If you prefer to use email, you can email them your link, you can post it in your Google Classroom, if you use other utilities like Remind or Class Dojo (the list is too lengthy to include them all) you can provide that link to your students that way as well.