Video Chat… Present Now… There’s so much…
…that it’s a little bit overwhelming.
Indeed, when you use it for the first time as the teacher, it does feel overwhelming. But the feeling of seeing your students’ faces will evaporate that feeling quickly. The first time you go online, you might want to make it very simple, or informal. Remember, this is entirely new for your students too! Take the opportunity to greet one another. They may want to use the webcam to show their friends their learning space. Some might be at the kitchen table, others might be in their bedrooms (you might want to ask them to do a quick tidy before letting everyone see it!) and yet others may be using a game console to connect into your session. Of course, different age groups can have a different sort of a “reconnect” activity. You might read a book to them, or you might ask a question of everyone. Some students may not have audio. That’s where the text chat comes in handy.
Only one person can speak at a time. Just like in real life. Everyone else should have their microphone muted.
The person speaking will automatically be the large image in the middle of the screen. Everyone is going to feel a little intimidated at first. Take the lead. Let them see that you are cool with being the speaker/big image and let them build their confidence to appear on screen. The younger generation has had access to apps like facetime for many years, so they may be comfortable; but they also may not be so comfortable. You know your kids, trust your teacher gut on this one. Push them as much as you can to participate, but like any of us, they may also need some time to observe before jumping right in.
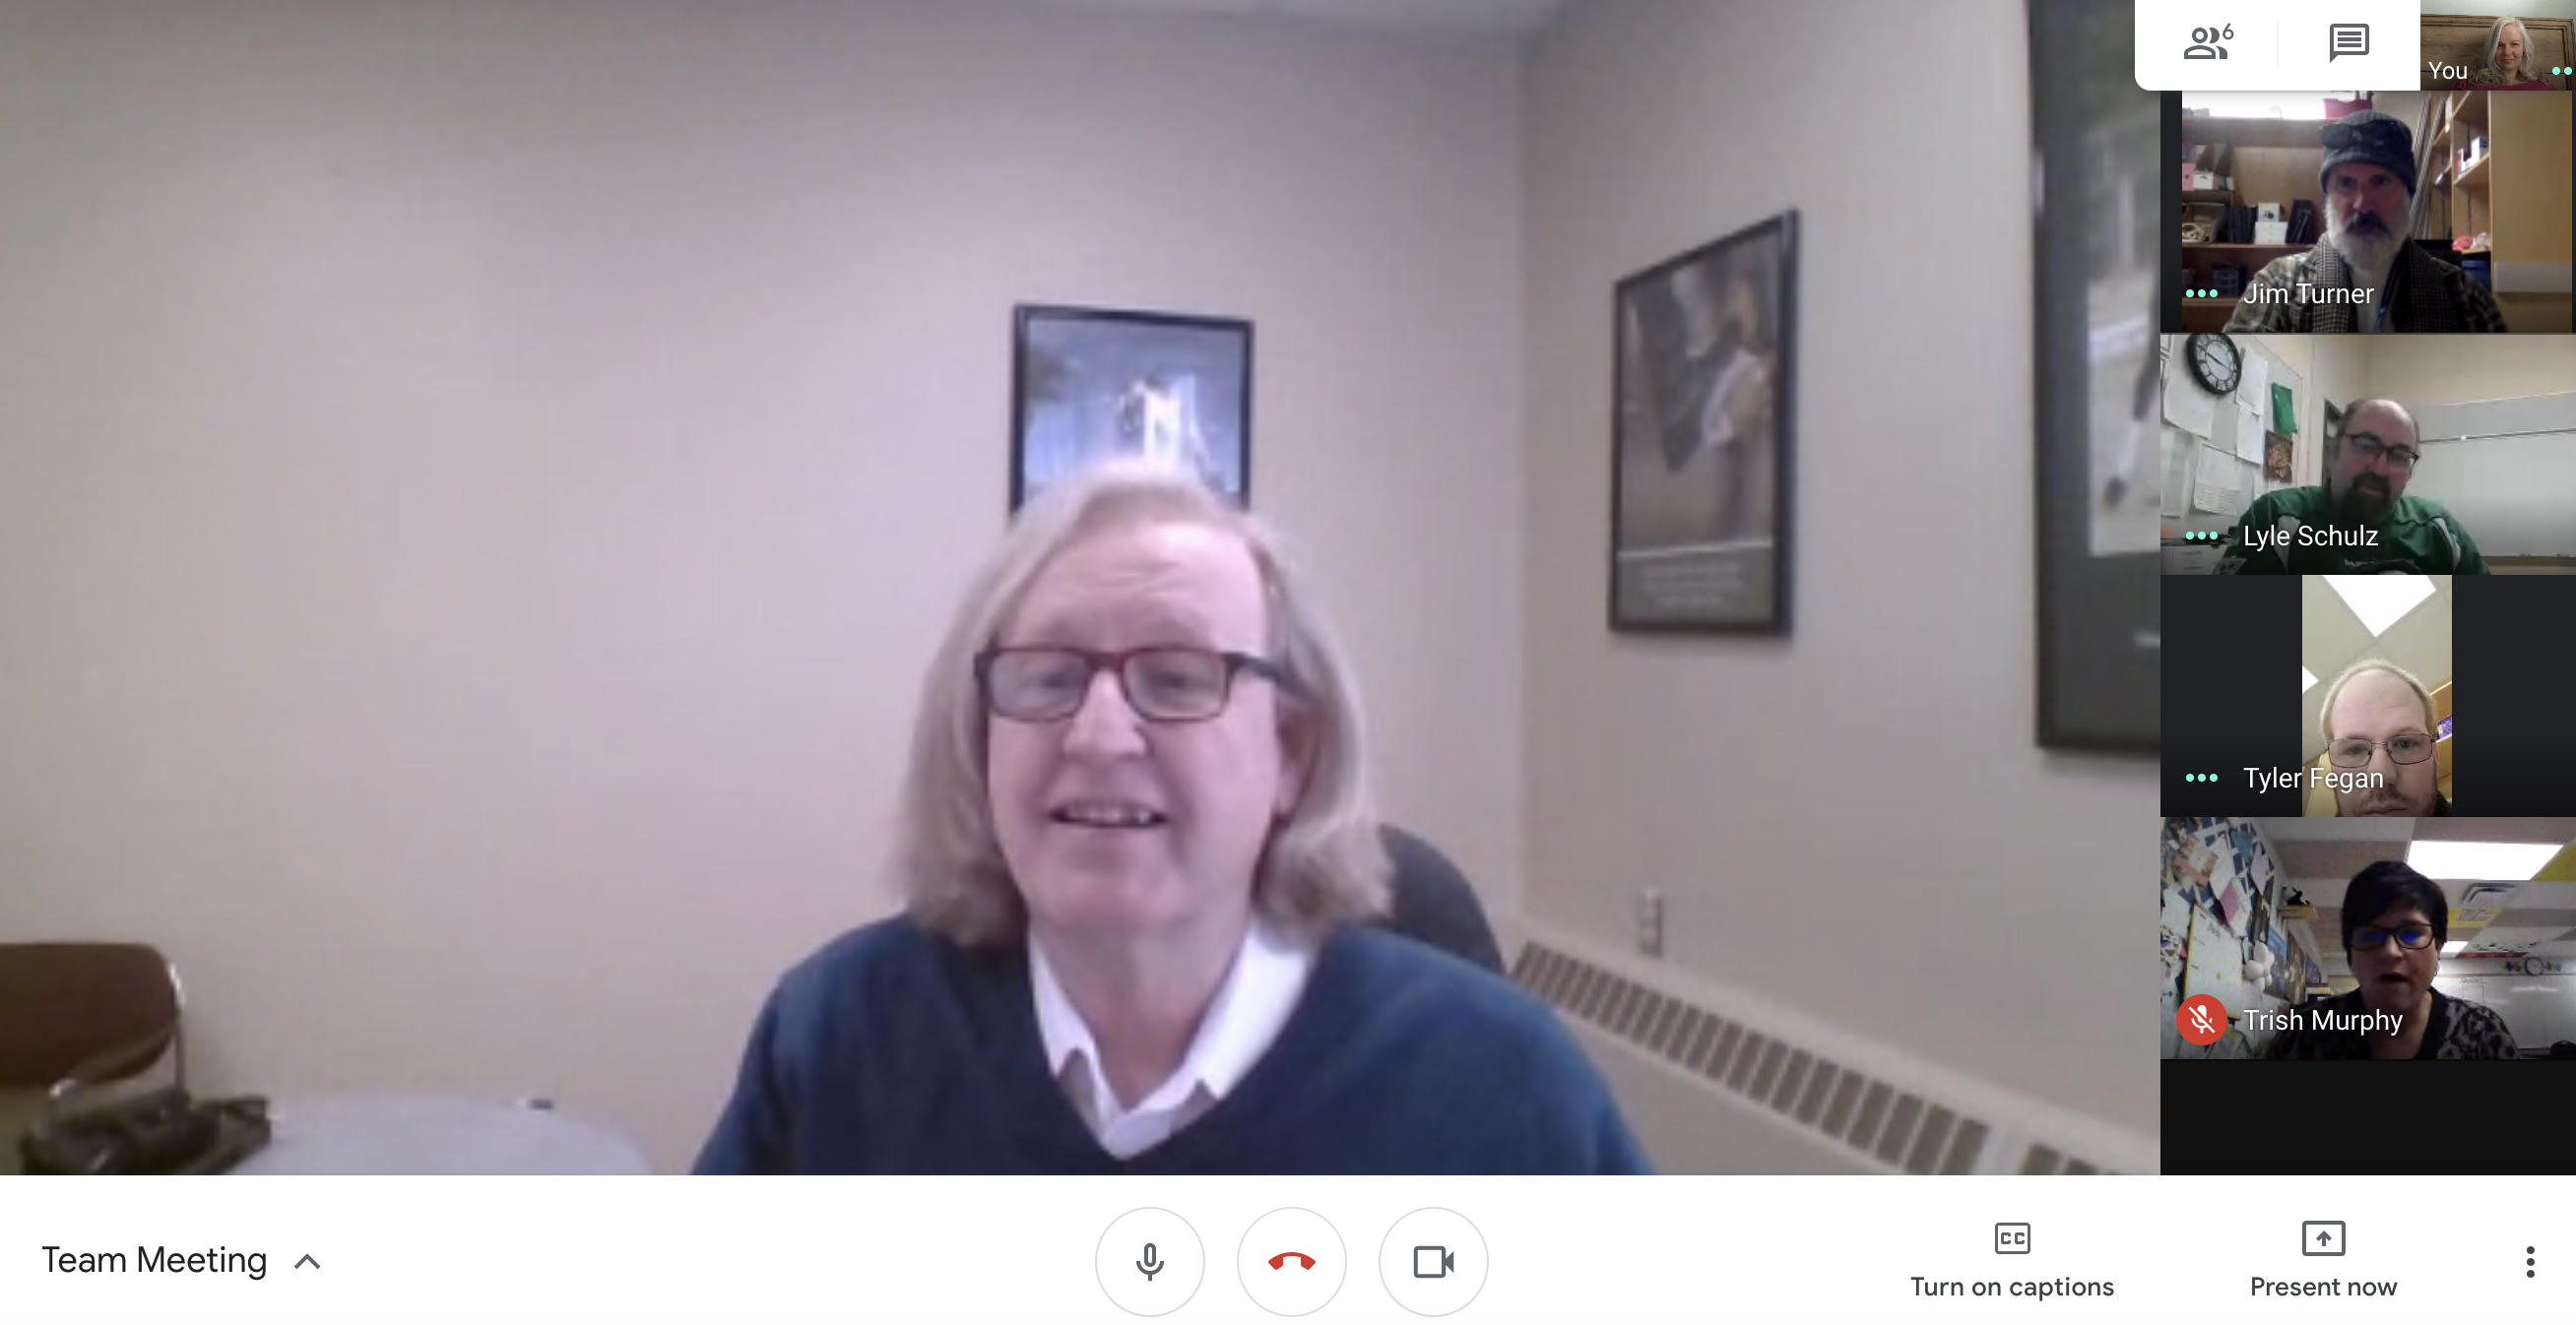
The image below shows the main speaker, Ted, as the centre image with the other participants (students if we are using classroom-speak) as thumnails on the right hand side. The user has their video appearing in the top right-hand corner of the screen as a smaller thumbnail.
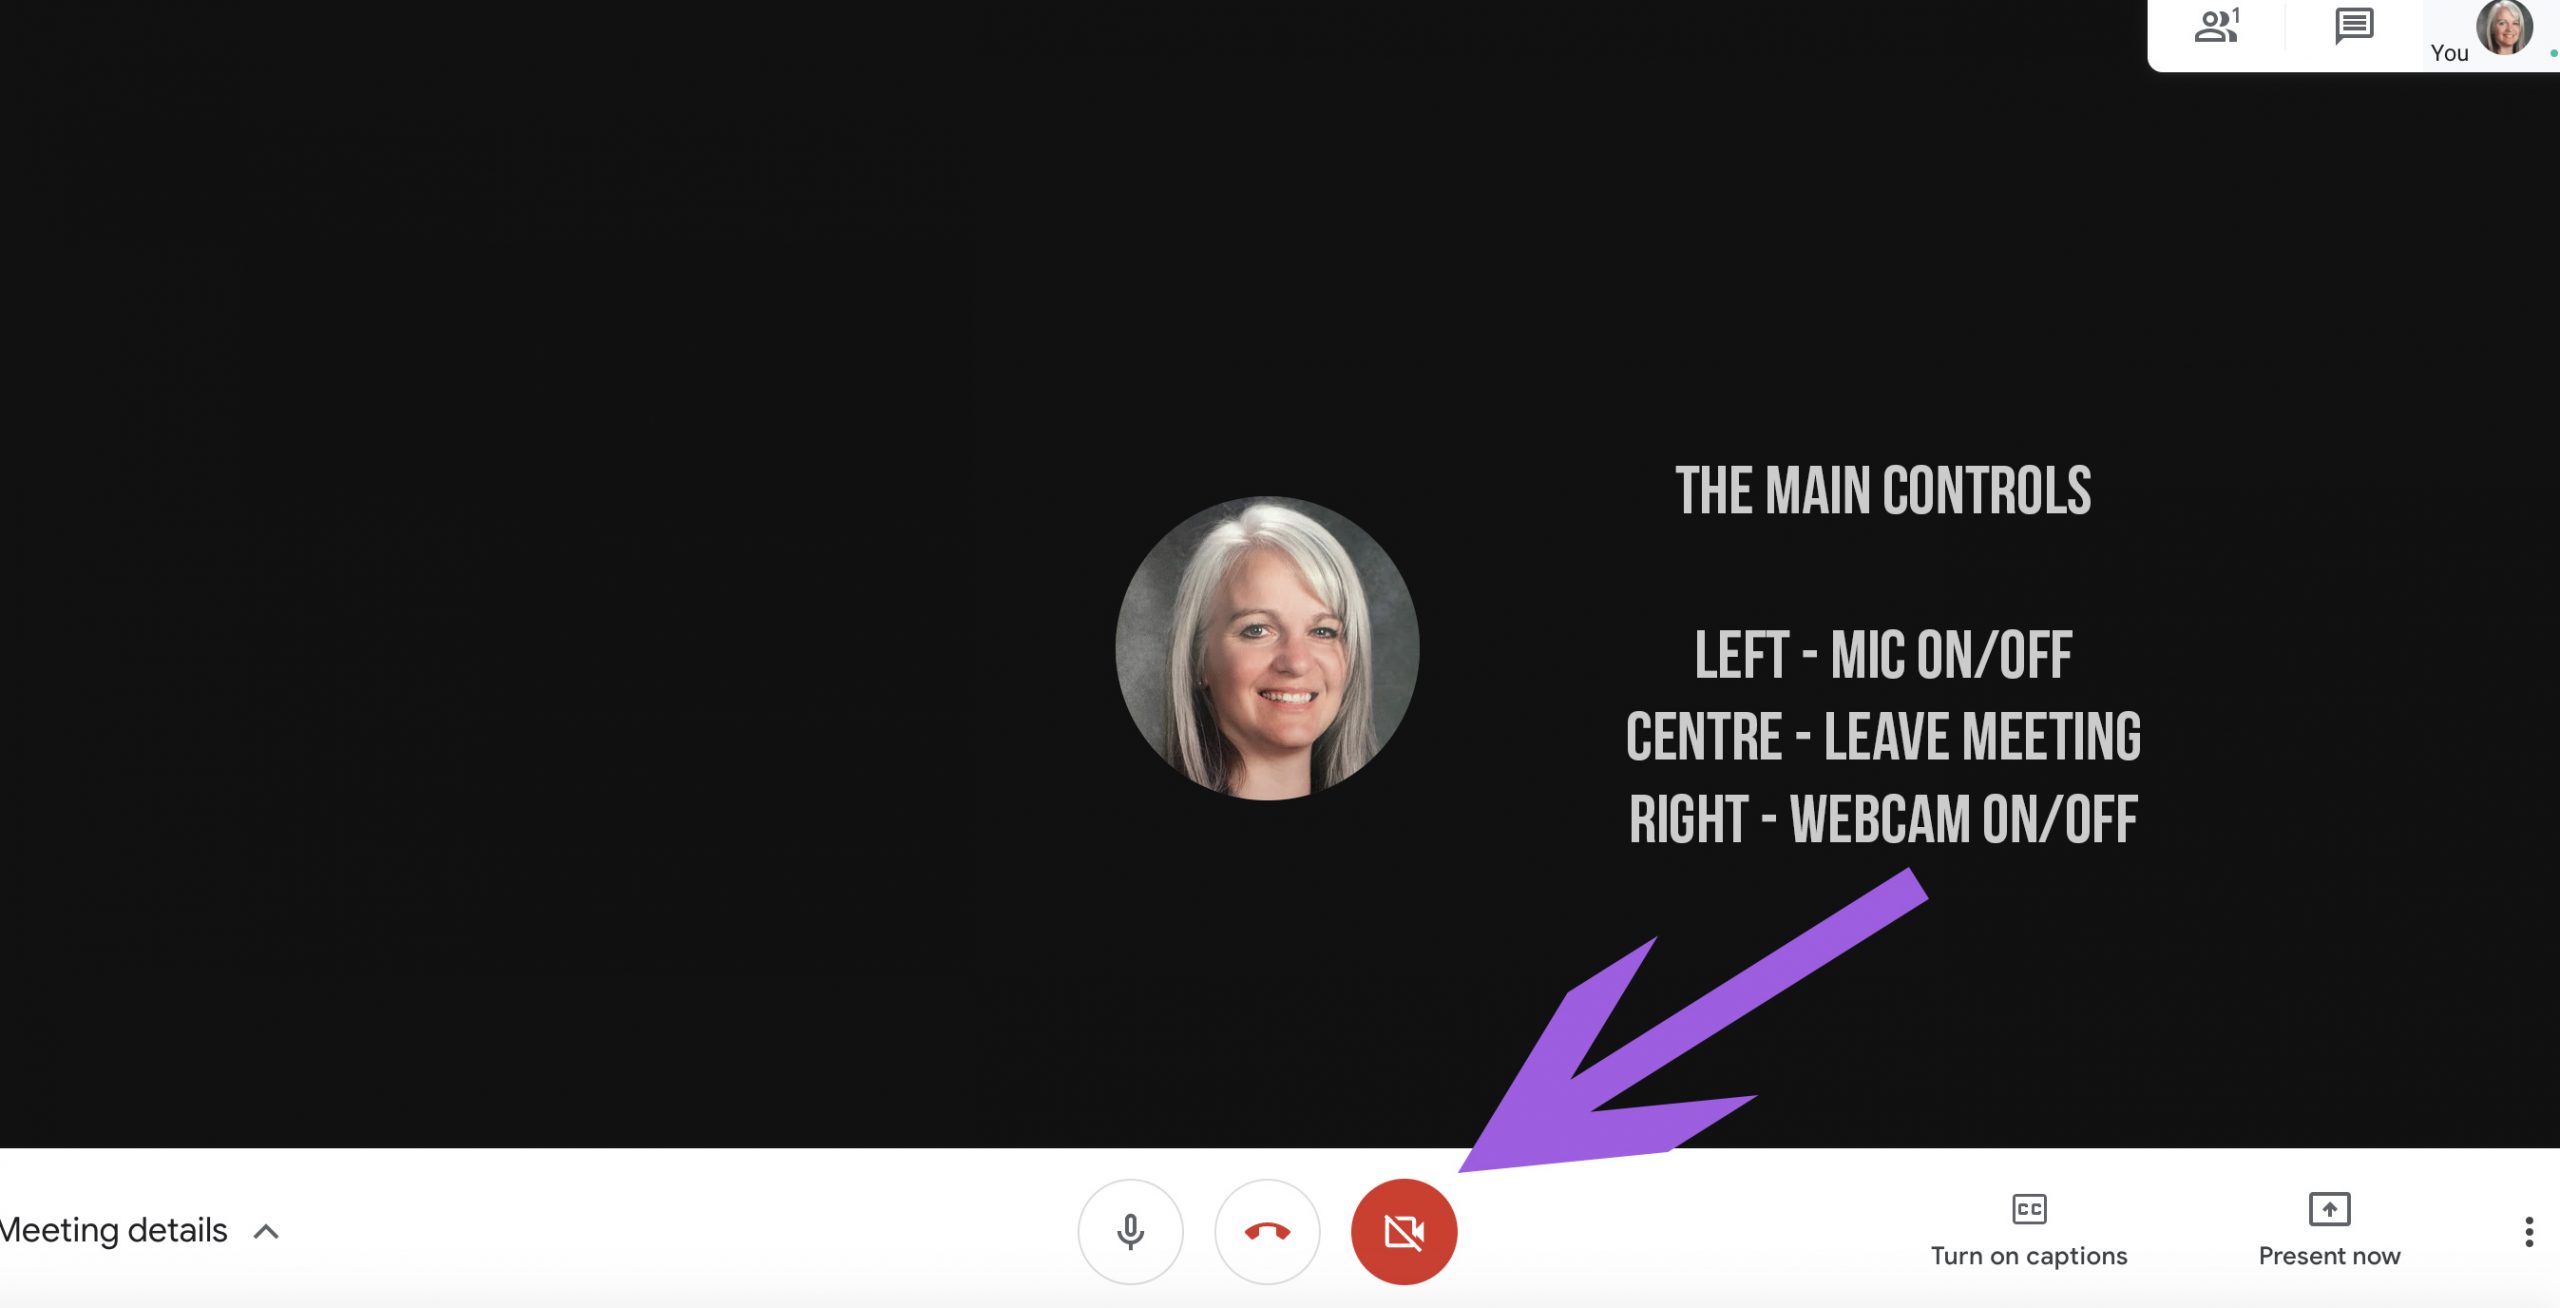
The Main Controls
The main controls for your Google Meet session are located at the bottom of the screen. They appear when you drag your mouse down to that region of the screen, but they disappear after a period of inactivity (ie: watching/listening) has taken place. To have them appear again, just drag your mouse down to the bottom of your screen.
In the above image, I have turned off my webcam. When the webcam is off, your profile photo is displayed. If you don’t have a profile photo, the first letter of your first name will appear there. If you don’t have a profile photo, the research on distributed learning environments would strongly encourage you to apply a profile photo to your account.
Please note that the camera image is red now. When the microphone is off, the button will appear as red.
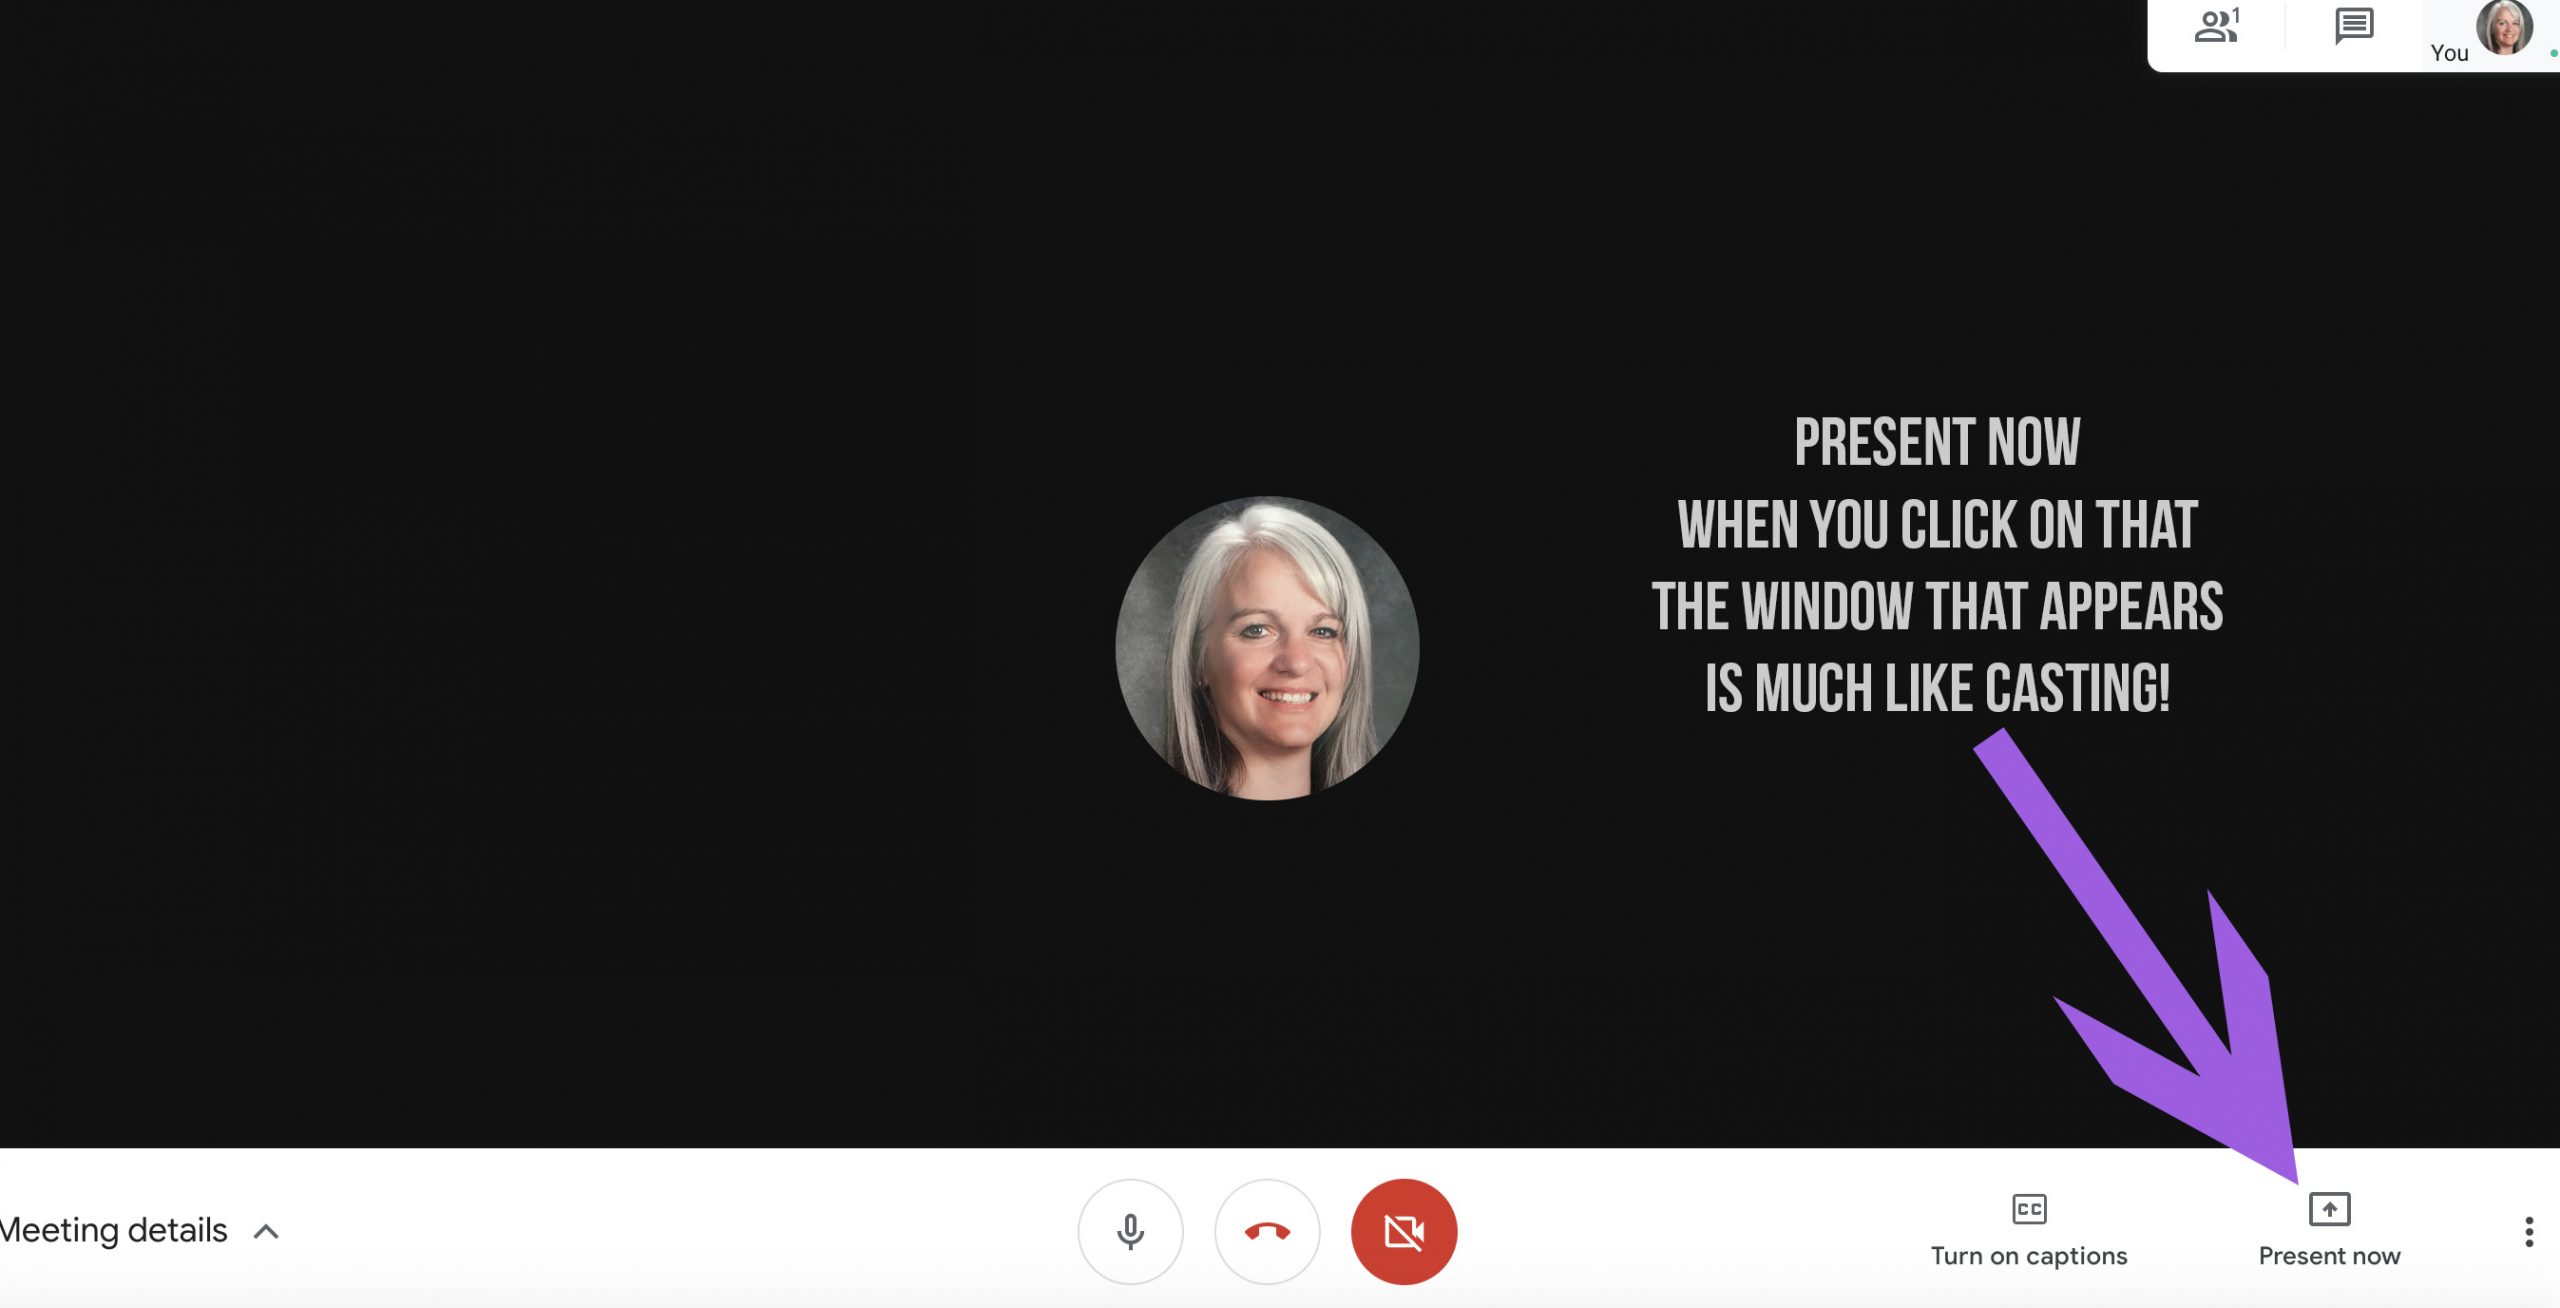
When you click on “Present now”, you are going to be faced with a choice to “present window” or “present entire screen”.
After you make your selection, you will see a screen that looks rather familiar. It’s the same type screen we are shown when we cast from our Chromebooks.
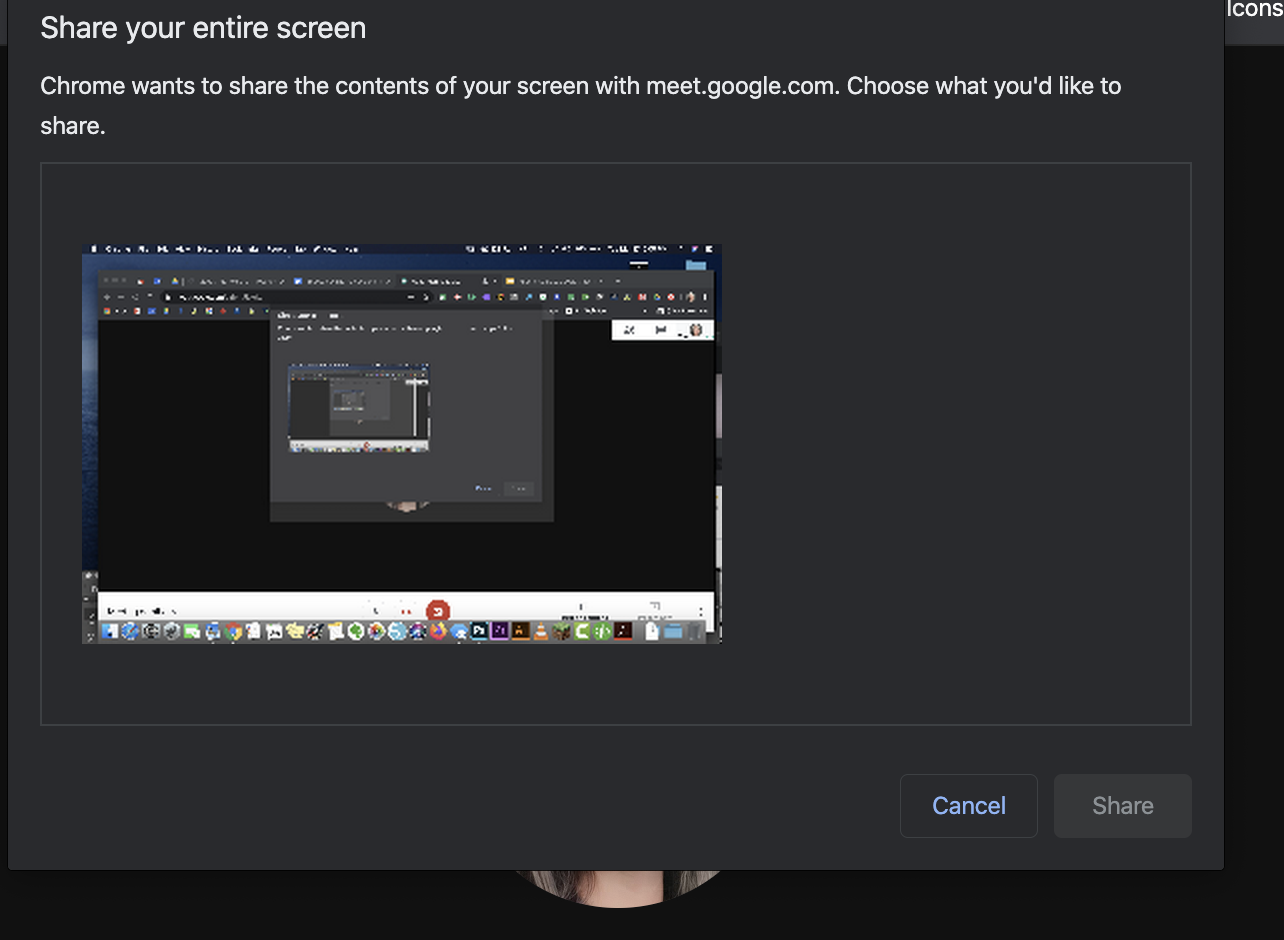
Depending on what you have open on your Chromebook, you may have more than one choice appearing there. You can see that I have only one choice in the above image. I need to click on it and then click share. Should you click “share” and receive a pop-up that says you can’t share your screen, just try it again.
(Pro tip: it’s a good idea to do this from the area of your school or house where you generally have the best wifi)
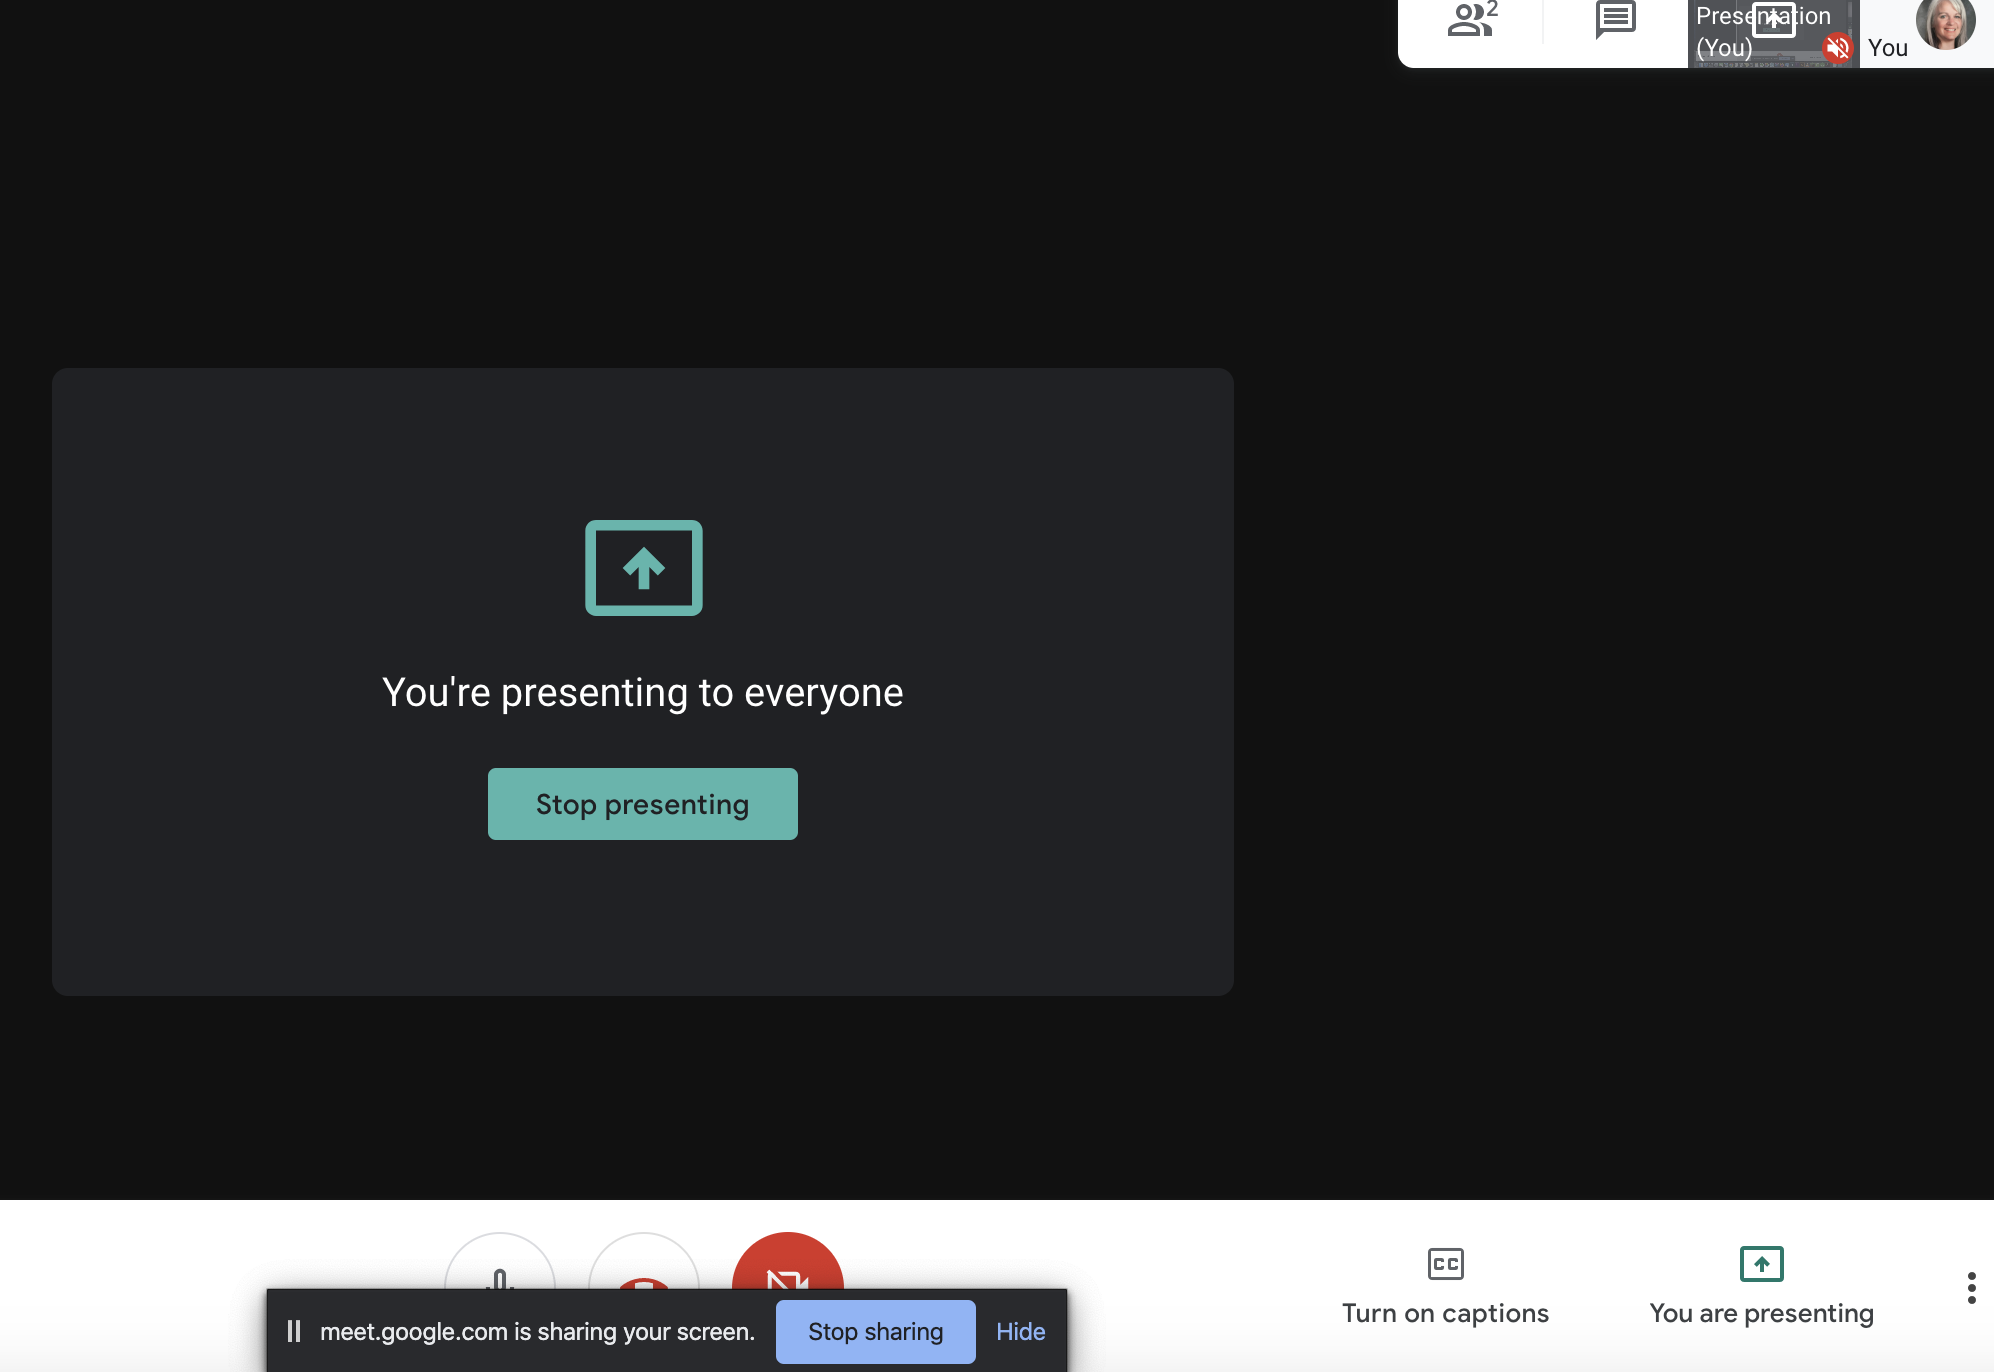
Now your meeting screen looks quite different. You no longer see yourself or anything else in the center of the screen. It merely states you are presenting to everyone. Now the students see your screen.
So, open the tab with your presentation. Or open the tab with the YouTube video and watch it with them. Or open your lesson in Kami and begin instruction. Whatever is on your screen is what your students are seeing. (so choose carefully!)